How to Install and Use PSP Video 9
Good thing about PSP is came with games and can play music, and with big screen display, it is good to watch movies and videos. 🙂
So stumble for a free PSP Video Converter – PSP Video 9.
Steps / Instructions on How to Install and Used PSP Video 9:
(Note: You probably need an internet connection for .NET Framework on Windows Installer, Microsoft .NET Framework Version 2.0 Redistributable Package (x86) – for 32bit, or Microsoft .NET Framework Version 2.0 Redistributable Package (x64) – for 64bit)
1. Download latest version of PSP Video 9 click here.
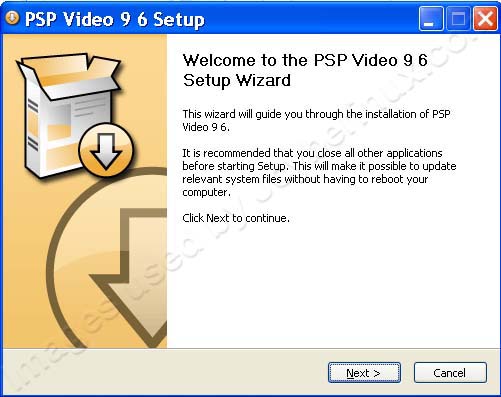
2. Launch the installer, upon the Welcome Installation Prompt, click Next.

3. Read the License Agreement, and then confirm it by clicking I Agree.

4. Choose Components, just select both of them, and then click Next.

5. Choose Install Location, click Browse and then choose your desired Installation path. Click Next afterwards.

6. An offer to install Hotspot Shield, in my opinion, I don’t really intend to used it, so I just skip it by clicking I do not accept. Then click Install to continue for the installation of PSP Video 9.

7. For some reason, the software for .NET Framework version is needed on the installation. That’s why I mention it first, if so happen that you have a newer version, click No. Otherwise, click Yes to commence a download and setup for .NET Framework of Microsoft.

(Note: You probably need an internet connection to start the download for the latest .NET Framerwork)
8. If no prompt given about the .NET Framework, then you already have it. The installation will start and wait until it finish.

9. Click Run PSP Video 9, and then click Finish.

10. On the launch of the PSP Video 9, it will ask for your PSP Model, to verify it, check at the bottom of your PSP, there is a barcode with a PSP Model on it. The last four digits is the PSP Model Number. Everything starts with PSP 1xxx is a PSP 1000 Original or (fat) as they called it. Starts at PSP 2xxx is a PSP 2000 Slim which is slimmer than PSP 1000 then finally, PSP 3xxx is a PSP 3000 which is differs on the texture and the home button change into PSP Logo.

After you define your PSP click Next.
11. It will ask for the PSP Firmware. (You can see your PSP Firmware; by going to Settings – System Settings – System Information, from there you will see the System Software which is your PSP firmware number is. Click Next afterwards.

12. Connect your PSP to your PC/Notebook. This will need for the configuration. Click Next.

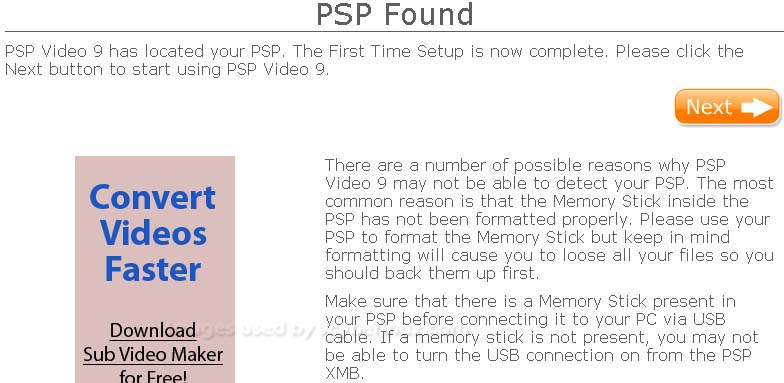
13. Then after successfully found your PSP, click Next.

14. Go forth on the Settings, from here, you can set or define your own profile Settings. The higher the setting is, the longer the conversion will takes place and the file size can be larger than before.


(Note: It’s alright not to change any settings, if you don’t know any technical jargon.)
15. Let’s head forth on converting the video file, click on Convert. From here, you have two choices, Normal Mode and the Power Mode.

(Note: For the sake of the beginners, I’ll going to demonstrate the Normal Mode, which is no hassle on technical jargon.)
16. Select on Normal Mode. Then select a file to convert by clicking Select File.

17. Then next is the output directory of the converted file. So click Browse, then choose your desired directory. Click Next.

18. You can change a name of the video, just put a title on it. Click Next.

19. From here is the Video Settings, Video Format: (Old or New) Preferred New Video Format for good results. Video Size: (Square or Widescreen) Preferred Widescreen, this refers to the Screen Resolution material of the video. Video Quality: (Basic, Medium, High or Best), this refers to the quality to display the video, if you choose low or basic, most likely it is pixelated. Enhance Quality: (Off or On), this is also helps to improve video/audio quality. Audio Quality: (Basic, Medium, High or Best), this refers to the sound, the better the quality less garbled sound.

(Note: As you can see below, the Speed, Quality and Size gauge changes, as you change the Settings. This will give you a better understanding, on how long it will take to convert the video and the quality of the video/audio and the file size you can store.) Click Next after the completion of your desired settings.
20. Click Start Converting. After you click it, you have an option to View Conversion Progress or Convert Video File to add on the queue for video conversion.


As you can see here the Video Conversion is in progress, wait until it finish, then you can transfer the converted video file on you PSP.

(Note: To transfer the converted video, connect your PSP to your PC/Notebook, then at your PSP, go to Settings then USB Connection, this will enable your PSP Memory Drive be accessible on your PC/Notebook as a Removable Disk, then go to VIDEO director, for example: F:\VIDEO, then from here, transfer the converted video file and the jpeg file. That’s it. Enjoy!)
(Note: Sony(PSP) and PSP Video 9 Logo/Images/Pictures has a respective copyright. I used it for demonstration purpose only.)
Related Entries / Articles / Links / References:
PSP Video 9 – Free PSP Video Converter by Jcyberinux.com
PSP Video 9 – Official Site
Download PSP Video 9 – Official Site
PSP Video 9 Screenshots – Official Site
Microsoft .NET Framework Version 2.0 Redistributable Package (x86) – Official Site
Microsoft .NET Framework Version 2.0 Redistributable Package (x64) – Official Site


